Are you among the millions of people planning to get a new iPhone 15? It’s exciting, we know, but don’t move too fast when getting started with your new iPhone, or you might cause yourself headaches. Instead, follow these instructions when you’re ready to transfer your data—and, for many people, much of your digital life—to the new iPhone. Apple also has a series of videos you can watch.
- Update your old iPhone to the latest version of iOS. If you have an Apple Watch, update it to the latest version of watchOS. This process can take some time, so it may be best done overnight before you move data to your new iPhone.
- Make sure you know your Apple ID and password, and if you have an Apple Watch, its passcode. You will likely have to enter them at least once during this process.
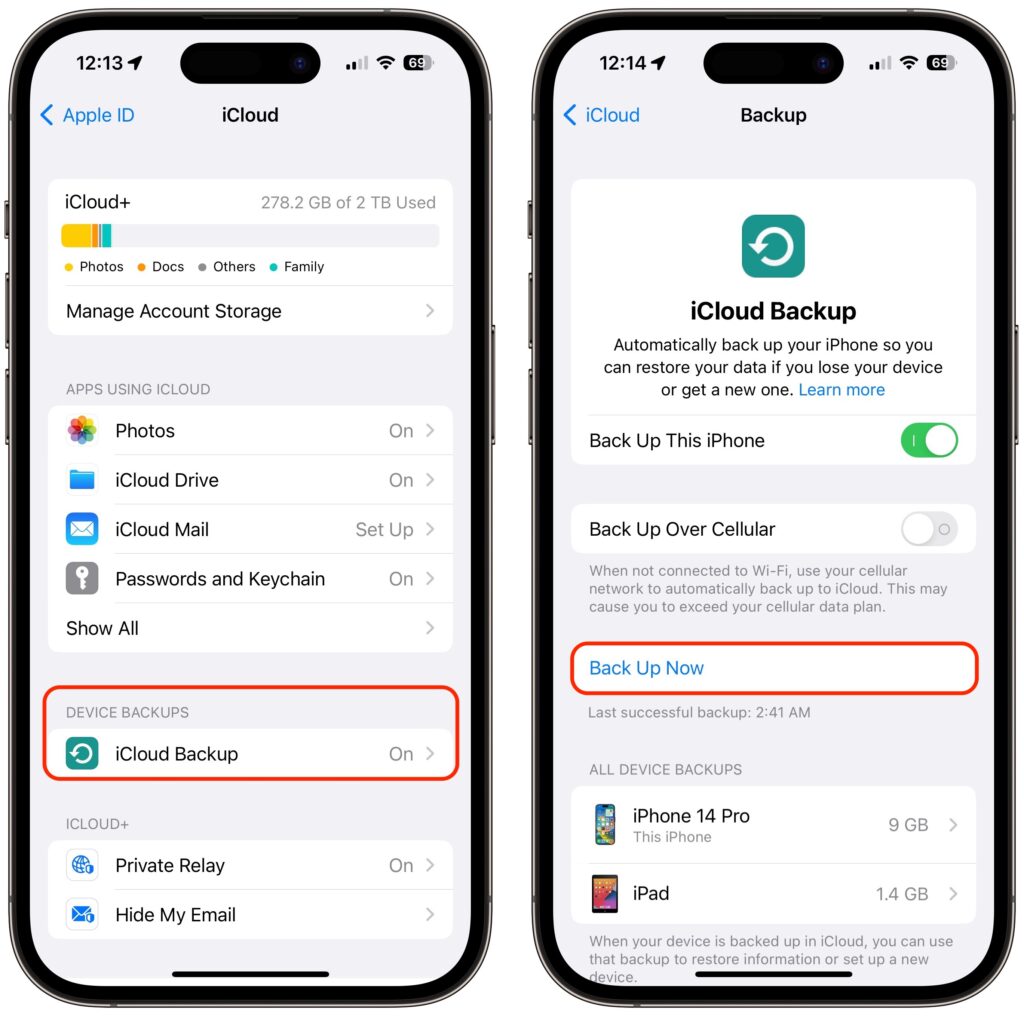
- Make a backup of your old iPhone to iCloud or your Mac. (If you back up to a Mac, be sure to encrypt the backup, or else it won’t include saved passwords, Wi-Fi settings, browsing history, Health data, and call history.) Or back up to both, for safety’s sake. We prefer iCloud backups because they’re easier and don’t introduce additional variables, like flaky USB cables. Apple will even give you temporary iCloud storage to make a backup when moving to a new iPhone. To initiate an iCloud backup, go to Settings > Your Name > iCloud > iCloud Backup and tap Back Up Now.
- If you have an Apple Watch, you shouldn’t have to unpair it from your old iPhone to transfer it to the new one, but if the automatic transfer doesn’t work, you can unpair it manually and pair it again later. (If you take the manual route and have a cellular Apple Watch, you’ll be asked if you want to keep or remove your plan. Assuming that you’re keeping your Apple Watch to re-pair with your new iPhone, keep the plan.)
- You shouldn’t need to worry about transferring a SIM card. If you order through Apple and connect to your cellular carrier account during purchase, activating the new iPhone should cause it to take over your phone number. The same should be true if you purchase directly through your carrier. Besides, it’s likely that iPhone 15 models sold in the US will rely on eSIM and lack SIM trays like the iPhone 14, so only non-US users might need to transfer the SIM card from the old iPhone to the new one. Even then, it’s better to contact your carrier and get them to activate the new SIM in the new iPhone because old SIMs don’t always support all current cellular features, such as full 5G support.
- Transfer your data, settings, apps, and purchased content in one of these three ways. None of them will be quick, despite the first one’s name, so do the transfer when you have time:
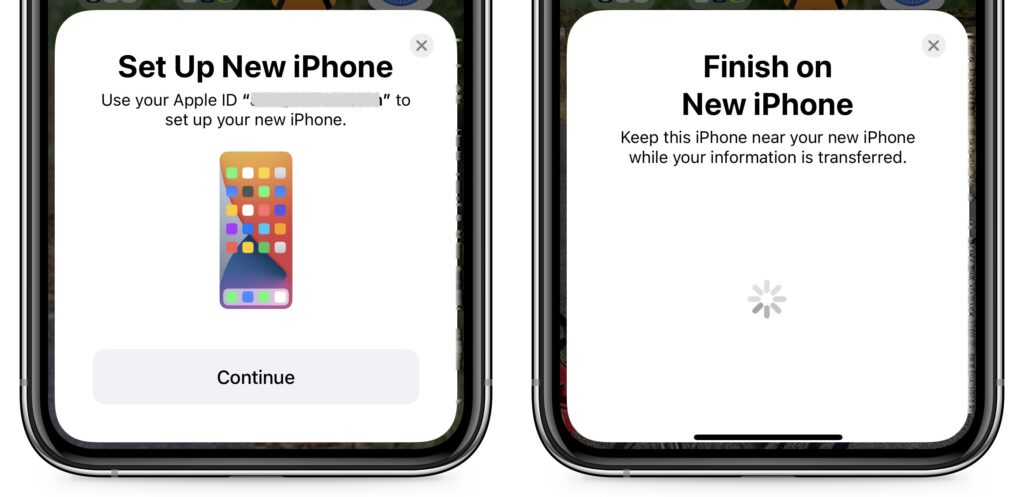
- Quick Start: With the Quick Start feature, content from your old iPhone copies directly from your old iPhone to your new one. We recommend this technique because it’s more likely to preserve app logins, something that’s less true when restoring from an iCloud backup. Put your iPhones next to each other (plugged into power), use the old iPhone to scan the animation on the new one, and then follow the rest of the steps.
- iCloud: With this technique, the new iPhone will download your content from your old iPhone’s iCloud backup. Once you’ve joined a Wi-Fi network on the new iPhone and tapped the Restore from iCloud Backup button, you’ll have to select the correct backup—likely the most recent one you just made. Keep your new iPhone plugged into power the entire time to ensure that all your content syncs during this step.
- Finder or iTunes: With this approach, you’ll restore your old iPhone’s content from a backup made to your Mac. Connect your new iPhone to your Mac using an appropriate cable, open a Finder window (or iTunes on an old Mac), select your device, click Restore Backup, and choose the appropriate backup—likely the most recent one.
- Quick Start: With the Quick Start feature, content from your old iPhone copies directly from your old iPhone to your new one. We recommend this technique because it’s more likely to preserve app logins, something that’s less true when restoring from an iCloud backup. Put your iPhones next to each other (plugged into power), use the old iPhone to scan the animation on the new one, and then follow the rest of the steps.
- Perform post-transfer tasks. Ensure that you can make and receive a phone call. If necessary, pair your Apple Watch with the new iPhone. You’ll also need to pair your Bluetooth accessories—including AirPods—with your new iPhone. Plus, some app data needs to sync to your new iPhone, so open the Mail, Contacts, and Calendar apps and check if they have your data. It could take a few minutes for them to fill up. Apps may request notification permissions again, and you may need to download content and in-app purchases.
- Finally, and this post-transfer task is becoming increasingly important, if you use two-factor authentication with an app like 1Password, Authy, or Google Authenticator, ensure you can get your 2FA codes using your new iPhone. 1Password and Authy are good about providing access to your 2FA codes from multiple devices—just log in to your account from each device—but Google Authenticator may require some additional setup since it didn’t originally offer any way to transfer codes to a new phone.
Although Apple works hard to make the process of transferring from an old iPhone to a new one as painless as possible, some things may fail to transfer seamlessly. For that reason, we strongly recommend holding onto your old iPhone for a week or so to ensure the new one can do everything the old one could. During that time, put the new iPhone through its paces with an eye toward checking every app you need.
(Featured image by iStock.com/Jozsef Zoltan Varga)
Social Media: It’s exciting to get a new iPhone, but take a few minutes to read our advice on what you need to do before—and after—transferring your data from your old iPhone.